Weekend of Awesome

IMG_9998 IMG_9984 IMG_9964 IMG_9970 IMG_9982 IMG_9993


photography workshop | product shoot for a new range of yarn | a total of 10 hours on the train to crochet | a burrito bar…

the makings of a very good weekend indeed! The best bit? Coming home after 4 days to my much missed family.

And I wasn’t the only one who had a good one, Emma learned to crochet!!

with 6 Comments

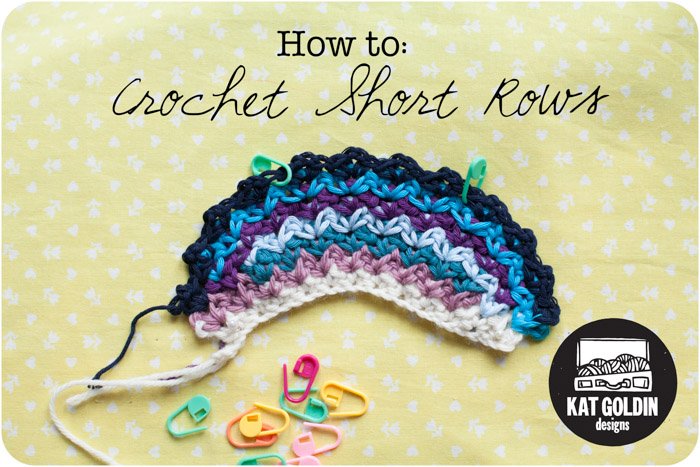
How to: Crochet Short Rows

Oh short rows – you clever things! Creating 3d shapes from flat fabric. Cupping breasts and bottoms *ahem*, shaping shoulders, hugging backs, heels and necks, creating hats from flat. So useful, yet much misunderstood (and sworn at).

We can’t be having that and I am here to sing your praises and unravel your mysteries.

(Well, I am going to try at least.)

IMG_9720-Edit

Short Rows: What are they?

Working short rows is a technique of working only part of a row or round to a set number of stitches, turning and working back a set number of stitches. This “set number of stitches” is determined by your pattern – sometimes it is part of the way, sometimes all the way to the end. You may work shorter and shorter rows initially, creating a piece that looks like a set of steps. However, in a short row section you will eventually work longer and longer “short rows” until the same number of stitches that was in your original row or round is worked. This builds up extra rows and therefore extra space where you may need a bit more room in your garment.  The longer short rows naturally curve your piece, creating the 3d element to your work.

Short rows are very common in knitting – at the bust, at the shoulders, at the back of the neck and hats are common places that you see them.  They are, of course used in crochet, but not as frequently and there are some differences to how they work.

Patterns with Short Rows, What Do They Look Like:

Patterns all written differently, but there tend to be 2 common ways to explain short rows. In one common way, stitch markers are used as a guide for what part of the row you will working. The other common short row technique will usually be written so that you work only part of the number of stitches in the row or rows, then eventually working longer and longer amounts until you are back to your original stitch count. The principle is the same in either way.

Example 1: In the first example, I am going to create short rows by working one stitch past the stitch markers on each side. This creates a 3d shape where the extra rows would be in the middle of the work – something like this could be used for bust shaping or maybe a shoulder cap . I have changed colours each row to show you where the rows  start and end.  This is just an example, your pattern will tell you how many stitches to work in each short row.

13ch.

Row 1: Starting in the second chain from the hook, 12sc. (in this picture, the first dc is hidden under the pin). Place stitch markers in stitch 5 and 8. Turn. (12)

IMG_9725

Row 2: 1ch, sc to 1 stitch past the  second stitch marker.  IMG_9727

Turn. (9)

Row 3: 1ch, sc to one stitch past the second stitch marker. IMG_9730

Turn. (6)

Row 4: 1ch, sc to 2 stitches past the second stitch marker. This is where it can get confusing, as people look at this and think they don’t have enough stitches, but you are going to work the last stitch into that very first row (the teal row in our example).  IMG_9733 IMG_9735

Turn. (7)

Row 5: 1ch, sc to 2 stitches past the second stitch marker.  IMG_9739

Turn. (8)

Continue working as above, working one more stitch past the second stitch marker on each row until all the stitches of the original row are worked. In this example, it is a total of 9 rows until all of the stitches are worked. You can see how the work is curved when pressed flat. IMG_9744

But really comes into its own when seen in 3d. IMG_9747


Example 2: This is worked, but crocheting progressively shorter rows initially, then building up the rows again, either in a series of progressively longer rows, or in one long row. (Each colour in this example = 2 rows) IMG_9858

If you are working a series of longer rows to build up the shape, you may have quite a large gap to “jump” as your rows get progressively longer (the example below is 4 rows of stitches between the 2 stitches). In this case, it is a good idea to connect the rows in some way. For single crochet, I insert my hook into the  turning chains of the rows I am “jumping” (there will be 1 t-ch for each 2 rows) and then into the stitch. I then yarn over hook and draw up a loop through the stitch and the 2 t-ch. Then yoh and pull through both loops.  This creates a very secure and nearly invisible join.

arrows
IMG_9864 IMG_9867

Alternatively, it may be that the short rows are just connected by one long row. In which case, the step tends to be very small. IMG_9860


These is just an example.  You can theoretcially use any stitch to make short rows (though see the tips below for some thoughts on choosing a stitch).  The Aruacaria Cardigan uses short rows as well.  Stitch markers are placed, and then short rows are worked starting at 2 angled crochet stitches after the stitch markers. After that, each row works one more angled crochet stitch of the first row, creating a really lovely shaped upper neck.  The same technique is also used at the sleeve caps (I’ve posted a more in depth explanation of the short rows in Aruacaria on The Crochet Project blog).

short rows numbers

Some Short Row Tips for Crochet:

- When you are working a stitch into the original rows after working short rows, pull the first stitch tight to eliminate a bump or gap in the stitches.

-  There is no need for “wrap and turn” as in knitted short rows.  However, gaps can still happen. Most stitches work well for short rows in crochet, but some taller stitches do tend to have slightly more noticeable joins. This isn’t a problem, but making sure that first worked stitch after the short row is nice and tight can help alleviate that. Alternatively, you can connect the “longer” rows to the short rows, by working into a t-cho or a loop of the stitch as discussed in example 2.

- As many crochet stitches do look different when worked in rounds versus rows, some forward planning is needed particularly if your piece is worked in rounds.  Some stitches don’t have noticeable front and backs, so it is not a problem.  The other alternative is to work in rounds, but turn your work at each round throughout so that the stitch patterns match.

- For a short row hat, you only work one edge of the wedge in short rows then work all the way down to the edge of the brim side of the hat.  This kind of hat construction is also called sideways. You can tell the hat is made this way because of the characteristic pinwheel on the crown. Hint: this is a great technique for tunisian crochet hats.

Anyone used short rows in crochet and have some top tips? Is there anything I have forgotten?

Patterns using short rows that I love:

- Bel by Aoibhe Ni

Dowding Socks by Rohn Strong

- Nebulous by Joanne Scrace

with 1 Comment

4KCBWDAY4: Colour

Knitting and Crochet Blog Week Day 4:  Colour Review: What are your favourite colours for knitted or crocheted projects?

…um, lets see, could it be grey and yellow or yellow and grey? or what about just yellow, yellow, yellow,  grey, or grey.

*cough* Yes, I think we have covered that one, so let us look to the future:

IMG_9567

Over the last few months, I have been drawn more and more towards off-white undyed yarns. It started when the lovely Jen at Artesano sent me some samples of Manos Fino and Artesano DK, both in cream. The 2 hanks sat on my desk for ages and I just couldn’t get them out of my head–something about the nakedness of them really appealed to me. That is where the colour inspiration for Alchemilla came from – I just knew it had to be in cream – partially to fit in with the colour scheme, but mostly because I just loved the idea of being enveloped in foamy waves.

IMG_8708

(free download)

I think designing a crochet item in off-white gives the piece an instant vintage flavour, reflecting the creamy tones of vintage doilies and lace. I like the idea of combining this retro element with more modern shapes and fibers, sort of honouring the history of crochet, while still making sure it is relevant today.

IMG_4380

Off white is also a colour that photographs really well here in Scotland, with our indirect sun and browny greeny purpley grey landscape. In a very sunny environment, white and cream have a tendency to blow out and stitch detail is lost.
IMG_9569

Almost all of my recent swatches have been in creamy shades and three out of my last six yarn support requests have also been off white.  I can see a trend developing…

||||||||||||||||||||||||||||||||||||||||||||||||||||||||||||||||||||||||||||||||||||||||||

Just a quick note to say that the competition to win my book, Crochet at Play and the yarn to make a Fox Stole of your own is closing today! Don’t forget to enter.

Also, my blog book tour has kicked off with Natalie at Bambino Goodies and another chance to win a book and some yarn!

Want to try before you buy? The Mermaid Tail Pattern has been published in the Guardian!


with 9 Comments

4KCBWDAY2: Inspiration and Design

Today’s  4KCBWDAY2  challenge is to design the house mascot, but truth be told, my head is simply too full of another design to work on something new. So, as the point is to “ blog about the journey which inspiration and investigating patterns, yarns, stitches, (etc) can often guide you through”, I thought that rather than an abstract design I might make one day, I would walk you through the process for my most recently published design: Aruacaria Cardigan from The Crochet Project (it is a botanical themed collection and bees are integral to botanics…its all related, see? ;) )

IMG_8435

In almost every design, I start with the photo I want to take of the design forefront in my mind. How will it look? What angles will I photograph the details from? What colour and shape will I use? Not to say that things don’t change as I go, but I am definitely a product person in the “process versus product” design discussion.

I knew I wanted a teal green for the cardigan, to add some darker colours to the palette for the rest of the designs. The yarn is Sublime Cashmere, Silk Merino DK.  I just found out the other day it is being discontinued *sob* but the baby version will continue *yay!*. I really love this yarn – it has great stitch definition, drape and twist to make really lovely wearable garments that you want to put on and feel special in. It isn’t cheap, but from experience the silk and twist of this yarn help it wear really well, and I think that is crucial when making a garment…as it takes so much time to make, it is worth it to ensure it will last.

The original design had a cabled collar on the edge. However, to achieve the feminine shaping we were aiming for, a flowing cabled shawl collar proved difficult to get right. After many failed swatching attempts (and even dreams about how the design might work),  it was back to the drawing board…or rather the well-thumbed stitch dictionary.

I have written before about how important I find stitch dictionaries to my work.  I simply could not live without them. However, it still often takes a ton of work to get from chart in a book to a workable stitch for a pattern – there are so many considerations – gauge, increases, round vs flat. I recently found a great stitch I was desperate to use for a cardigan, only to realise it really can only work in the round, and hard as I tried, steeking wasn’t oing to work for a full cardi. But, all that aside, stitch dictionaries are invaluable.

In looking through, I found a pattern that I had actually earmarked for something else, but it looked so like a peacock, I simply couldn’t let it go (the original name  of the cardigan was Peacock in the Garden). It was doubly ideal, because it was worked from the edging out in rows. This meant I could work it all the way from bottom front edge, up around the neck and down to the other bottom front edge in one piece, which is really ideal for the drapey shawl collar I was after.

IMG_8444

The construction of the sweater is a seamless, set-in shoulder, adapted from Barbara Walker (with help from Joanne Scrace). It starts at the neckline, with the back worked on one side of the foundation chain, then the front pieces worked on the other side of the chain, then joined at the underarm. While it doesn’t work well for every garment, a seamless construction fits in well with the ethos of The Crochet Project – with its emphasis of lots of drape and flow. As the design uses short row shaping at the back and in the shoulders, I needed a main stitch that would hide the gaps and also have a right side that wasn’t too different from the wrong side. I chose to use angled crochet, which works well to hide the gaps short rows can sometimes leave, and its back and front of the stitch are virtually indistinguishable.

Untitled-1

Because I’d never made a seamless set in sleeved cardigan before, I actually wrote and graded the pattern as I made it – not really the best practice when designing (it usually involves less ripping if you plan it out first), but I simply couldn’t picture how it would all come together. I only had a week from starting the cardigan to finishing the design for the photoshoot, so I really had to move on it and this approach, while intensive, did mean I was finished in 7.5 days!!

In the end, I have to say I am very pleased with the results.  It is easily my favourite design to date, as I just love how it all came together, and it made the model VERY happy when she got to keep it as a thank you!!

(The pattern is available on Ravelry: buy now. You can also read more about and see the rest of the designs in The Crochet Project here)

4kcbw

with 15 Comments

KCBWDAY1: Busy Like a Bee

Having always found out too late about the annual Knitting and Crochet Blogging Week in previous years, I am very excited to take part this year!!

KCBWDAY1 The House Cup:

The challenge for day one, for those of you not taking part, is to determine your “house”  - namely what group of crocheter or knitter do you fall in to?  I used to be a one project at a time kind of person – never casting on until something else was finished, but recently, I tend to have multiple projects on the go.  Am I, like Sarah, polywipamous? Naturally, no.  In fact, I actually don’t like my attention being pulled from any one thing. I want to get lost in a project, throw myself in it completely and not look at anything else until it is done.

However,  a look around the studio will tell you a different story.

This is just my deadline swatches – 4 for this month’s book project target and 2 for other publications.

IMG_9559

And then there are my current works in progress: IMG_9563-Edit

Each serves a purpose:

- one for the car and cafes

- one for reading emails

- one for TV viewing

With another yarn delivery expected this week, no doubt there will be at least one more WIP on the go. Could I leave the new project until the one in the middle is finished? Probably.  Will I? Probably not. For as much as I want to be someone who stays with one project until the bitter end, I fear I have become a bit of a new project addict – loving the initial swatch and design stage and then having to slog through to get it done.

So, as much as I want to be a Monkey, I will be joining the house of bee.

bee


with 28 Comments